

Shipping is a critical part of the online shopping experience, and WooCommerce offers a versatile setup for managing various shipping options. Setting up shipping effectively can help ensure timely delivery, build trust with your customers, and even optimize costs. This guide walks you through the essential steps to set up shipping in WooCommerce.
Step 1: Access the Shipping Settings
- Login to WordPress Dashboard: Access your WordPress dashboard and navigate to WooCommerce > Settings.
- Go to the Shipping Tab: In the WooCommerce settings menu, click on the Shipping tab.
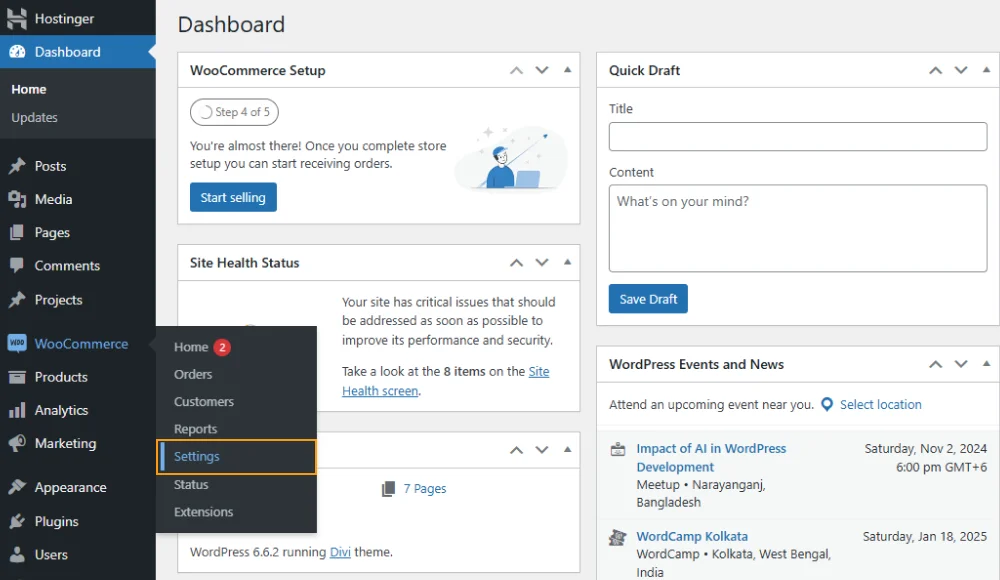
Here, you’ll see three main options: Shipping Zones, Shipping Options, and Shipping Classes. Each of these sections plays a unique role in setting up shipping for your WooCommerce store.
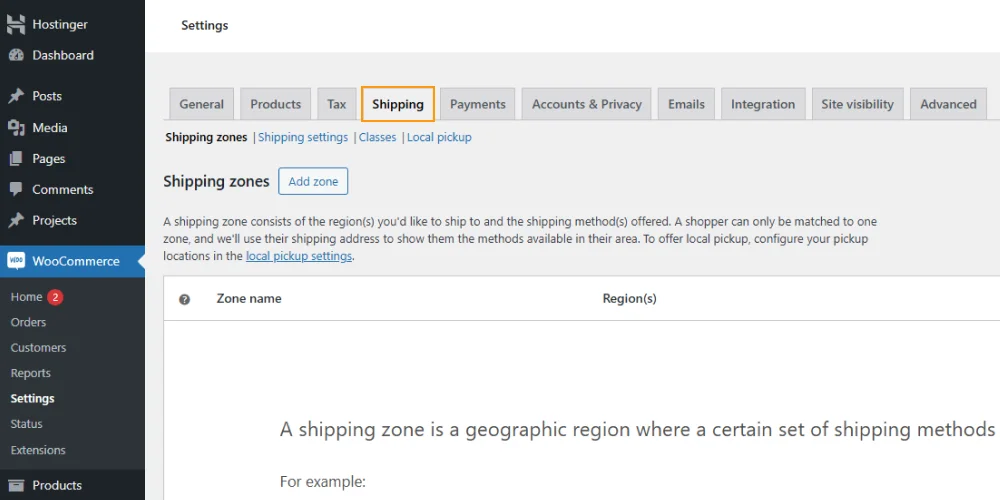
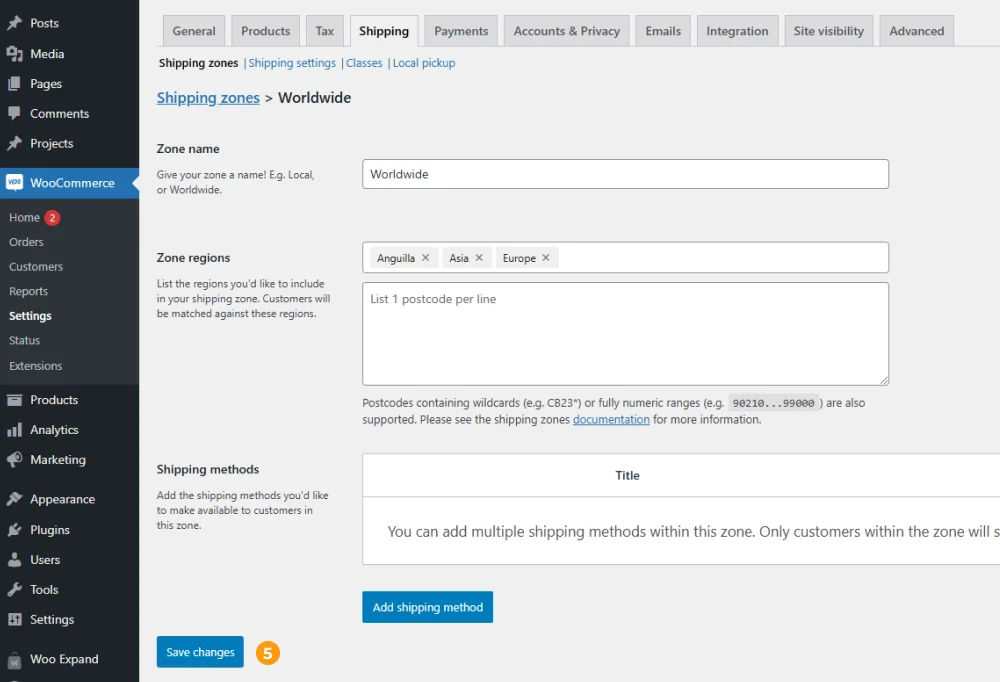
Step 2: Set Up Shipping Zones
Shipping Zones allow you to define regions and assign specific shipping methods for each. For instance, you may want to offer different rates or shipping methods for domestic and international locations.
- Add a New Shipping Zone: Click Add shipping zone.
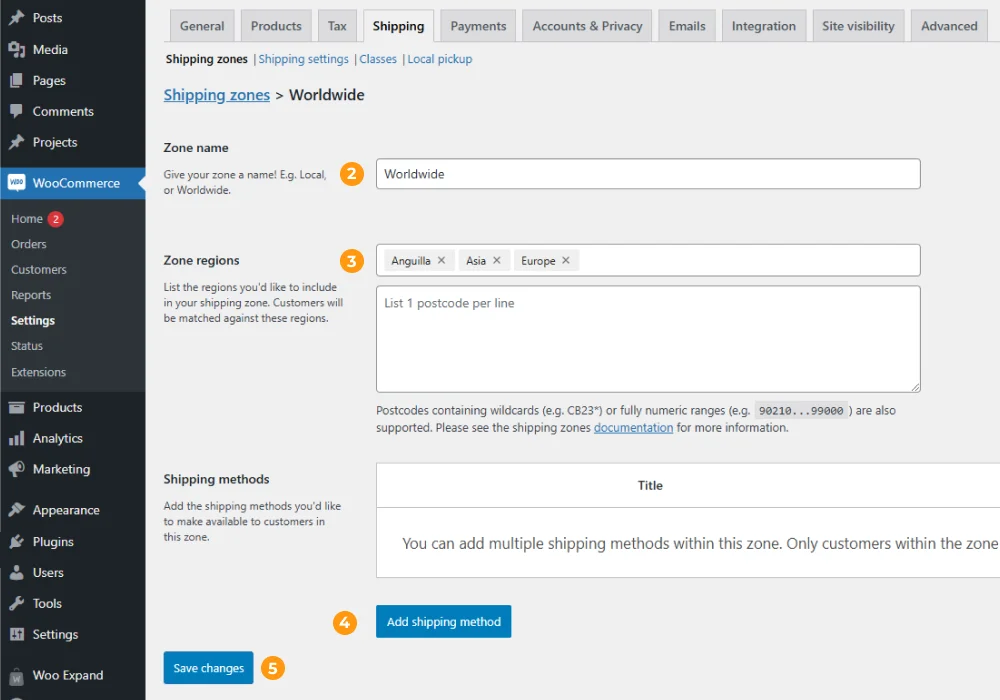
- Name the Zone: Give the zone a descriptive name, such as “Worldwide”
- Select the Zone Regions: Choose the regions ( such as Anguilla, Asia, Europe or even postal codes) that this zone will cover.
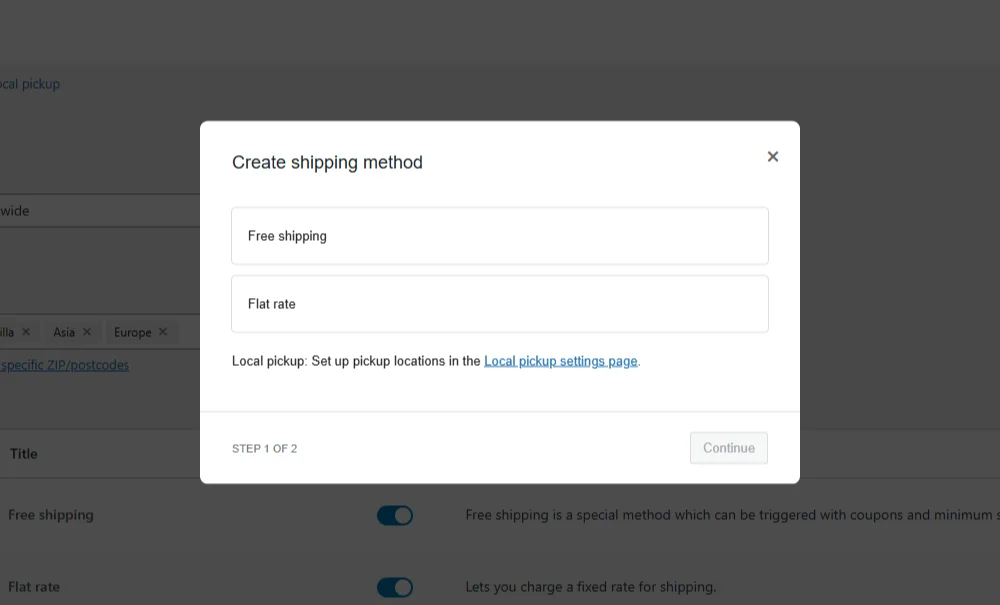
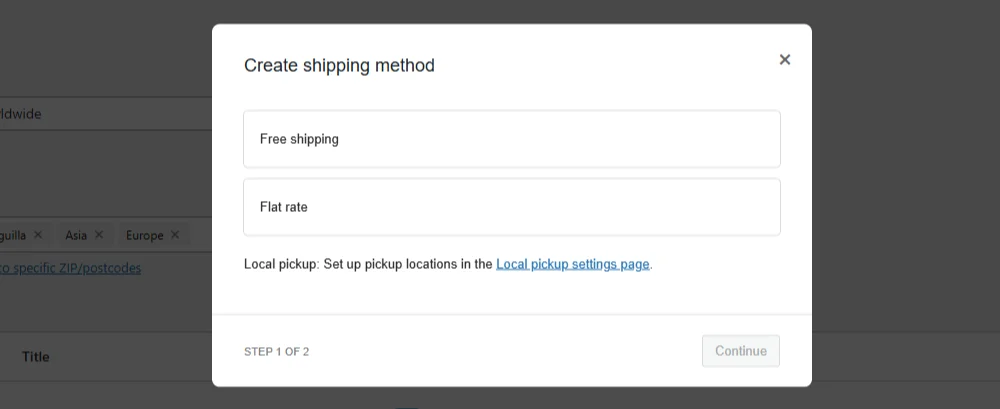
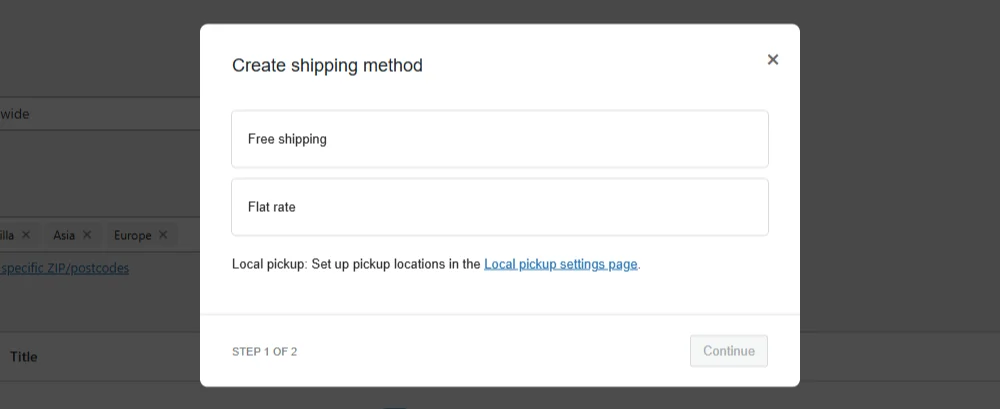
- Add Shipping Methods: After setting up the zone, you can add specific shipping methods, such as Flat Rate, Free Shipping, or Local Pickup.
- Flat Rate: This option allows you to set a standard shipping rate for each zone.
- Free Shipping: Define conditions under which free shipping is offered, such as minimum order amount.
- Local Pickup: This option is ideal if you offer an in-store or warehouse pickup option for customers in your area.
- Save Changes: Don’t forget to save your changes once you’ve added the necessary shipping methods.

Step 3: Configure Shipping Methods for Each Zone
After adding shipping methods, it’s time to configure them for each shipping zone:
- Flat Rate Shipping:
- Click Edit beside the Flat Rate option.
- Enter the Shipping Cost. You can add additional charges or fees, such as per item, percentage-based, or flat amount.
- Tax Status: Specify if this cost is taxable or not.
- Free Shipping:
- Click Edit beside Free Shipping.
- Set conditions for free shipping, such as minimum order amount, valid coupon code, or specific products.
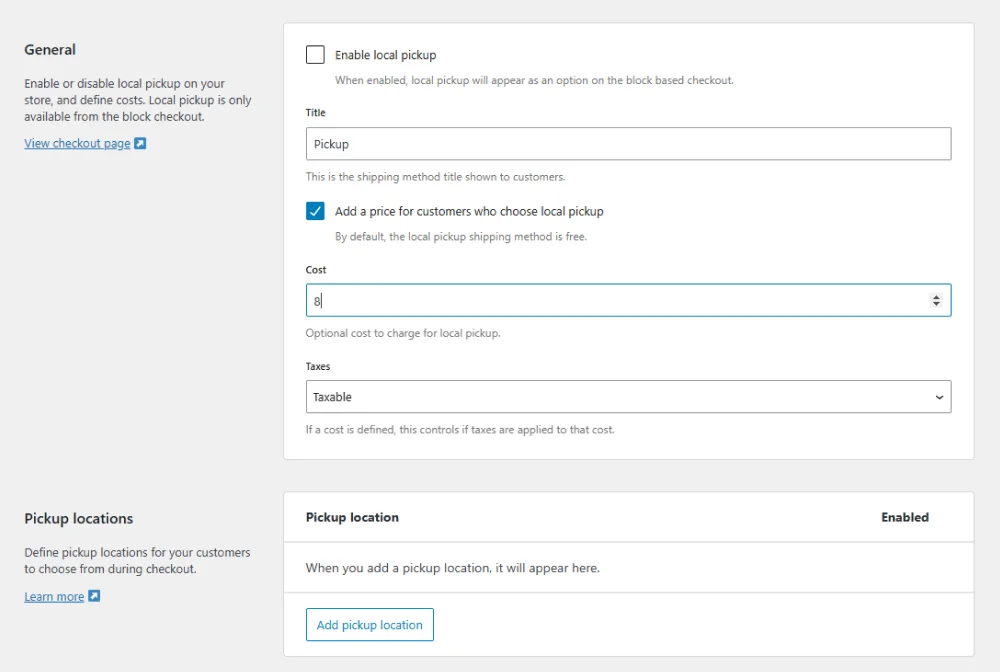
- Local Pickup:
- Click Edit beside Local Pickup.
- Set the pickup fee (if applicable) and specify the tax status.
Step 4: Set Up Shipping Classes
Shipping Classes allow you to categorize products with different shipping rates. For instance, if you sell items with varying weights or sizes (like small gadgets vs. large furniture), using shipping classes can help simplify the shipping cost management.
- Go to Shipping Classes: Under the Shipping tab, select Shipping Classes.
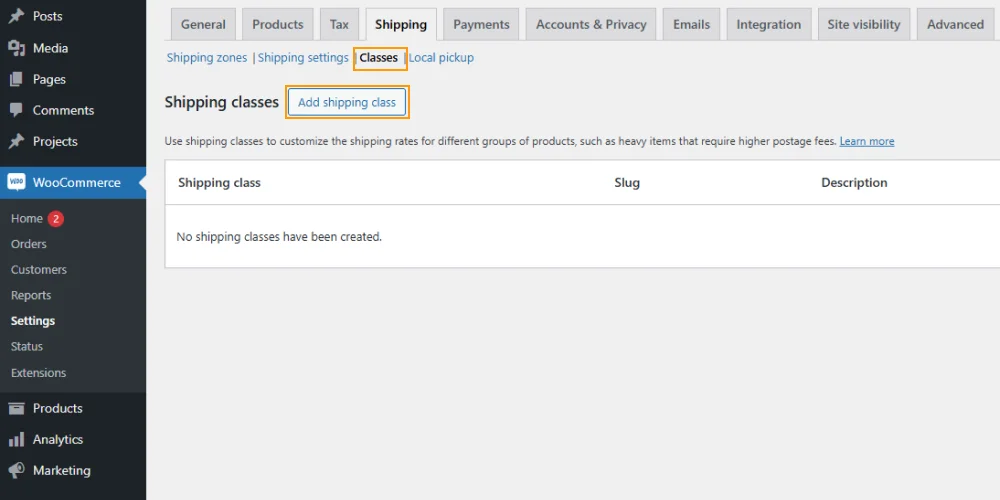
- Add a New Shipping Class: Click Add shipping class, then enter a name, slug, and description for the class (e.g., “Heavy Items” or “Fragile Items”).
- Assign Rates to Shipping Classes:
- Go back to Shipping Zones, choose the shipping zone you want to edit, and select the Flat Rate method.
- In the Flat Rate settings, you’ll see an option to enter costs based on shipping classes. Define the specific cost for each class and save your settings.
- Assign Shipping Classes to Products:
- Go to Products > All Products and select the product you wish to edit.
- Scroll down to the Shipping tab in the product data section.
- Assign the relevant shipping class to each product and save.
Step 5: Configure Additional Shipping Options
WooCommerce also includes several additional shipping options, which are essential for a smooth customer experience.
- Go to Shipping Options: Under the Shipping tab, click on Shipping Options.
- Enable or Disable Shipping Calculations: Choose if you want to display shipping calculations on the cart page, or if shipping is only calculated after the customer enters their address.
- Default to Customer Shipping Address: Set whether to default to the customer’s billing address or shipping address when calculating rates.
- Enable Debug Mode: If you’re testing or troubleshooting, enabling debug mode can help you ensure your settings are functioning correctly before making your site live.
Step 6: Use Shipping Plugins for More Advanced Needs
If WooCommerce’s built-in options aren’t enough for your business’s shipping needs, you can extend its functionality with plugins. Some popular plugins for WooCommerce shipping include:
- WooCommerce Table Rate Shipping: This allows you to set up complex shipping rates based on conditions like item count, weight, or price.
- WooCommerce Shipping & Tax: This plugin offers real-time USPS and DHL rates for US-based stores.
- Advanced Flat Rate Shipping Method: Set up advanced rules for flat rate shipping by category, product, or user role.
Step 7: Test Your Shipping Setup
Before launching, it’s essential to test your shipping setup to ensure accuracy and a smooth experience for customers:
- Go to Your Store: Add a product to your cart and proceed to the checkout page.
- Verify Rates and Options: Make sure the shipping rates and methods appear correctly based on the customer’s address.
- Place a Test Order: If possible, complete a test order to experience the entire shipping process and catch any potential issues.
Conclusion
Setting up WooCommerce shipping correctly is essential for a streamlined customer experience and efficient order fulfillment. By following these steps, you’ll have a solid shipping configuration that fits your business needs. Remember, shipping is an area where you can continue to refine and optimize based on your customers’ needs and feedback, as well as evolving operational costs. With WooCommerce’s flexibility, the setup you create today can grow alongside your business.


0 Comments