Setting up the WooExpand plugin is simple and follows the standard WordPress plugin installation process. You can do it through your WordPress dashboard or upload it manually using an FTP client.
Here is a step-by-step guide to installing WooExpand through the WordPress admin panel:
Step 1: Download the WooExpand Plugin #
Log in to your DiviExpand Account. Hover over your profile name from the top menu and click Downloads.
Then download the latest version of WooExpand. The file should look like:
woo-expand.zip

Step 2: Upload and Install the Plugin #
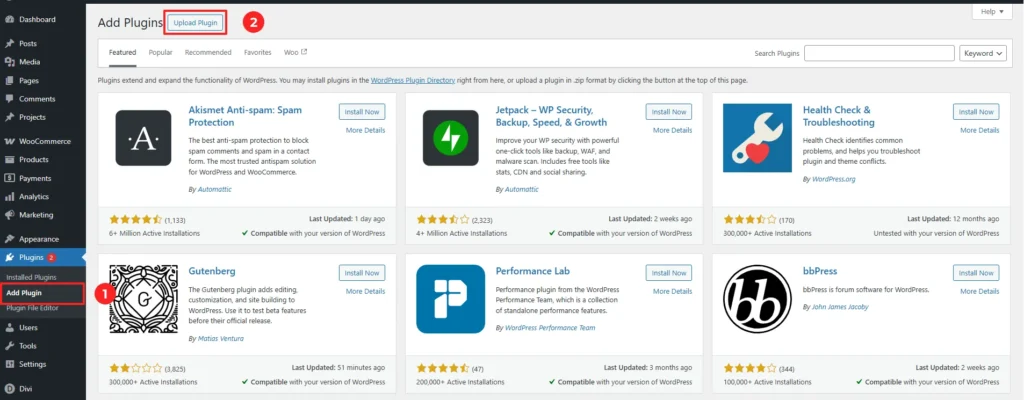
- Go to your WordPress Dashboard (where you want to install the plugin).
- Navigate to wp-admin → Plugins → Add New.
- Click the Upload Plugin button at the top.
- Select the woo-expand.zip file you downloaded and click Install Now.

Step 3: Activate the Plugin #
Once the installation is complete, click the Activate Plugin button to enable WooExpand on your site.

Step 4: Enter Your License Key #
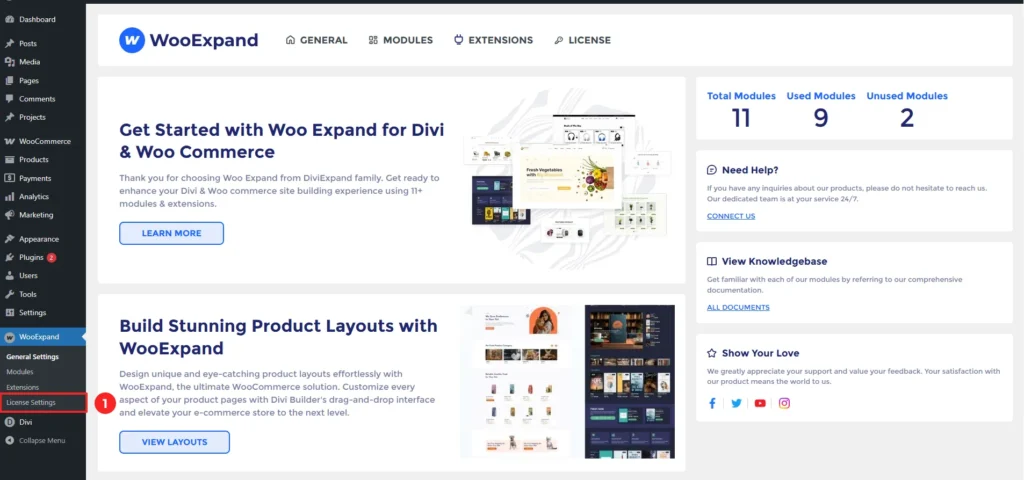
After activation, a new menu item named WooExpand will appear in your WordPress dashboard.
- Hover over WooExpand and click on License.
- Go back to your DiviExpand Account, hover over your profile name, and click Licenses.
- Copy your license key for WooExpand.
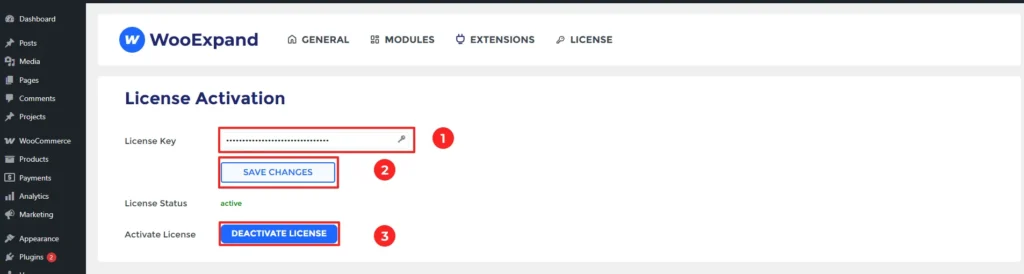
Step 5: Activate Your License #
- Return to the License section in your WordPress Dashboard.
- Paste the copied license key into the License Key field.
- Click Save Changes, then click Activate License.
✅ Done!
Your WooExpand plugin is now fully installed and activated. You’re ready to build powerful, visually appealing WooCommerce experiences with Divi.