

Introduction:
In need of a stunning product category list for your Divi-powered WooCommerce store – without coding or shortcodes? You’re not alone.
However, since Divi does not come with a native product category list module for WooCommerce, it leads store owners to find third-party plugin options that do not work well with the Divi Builder.
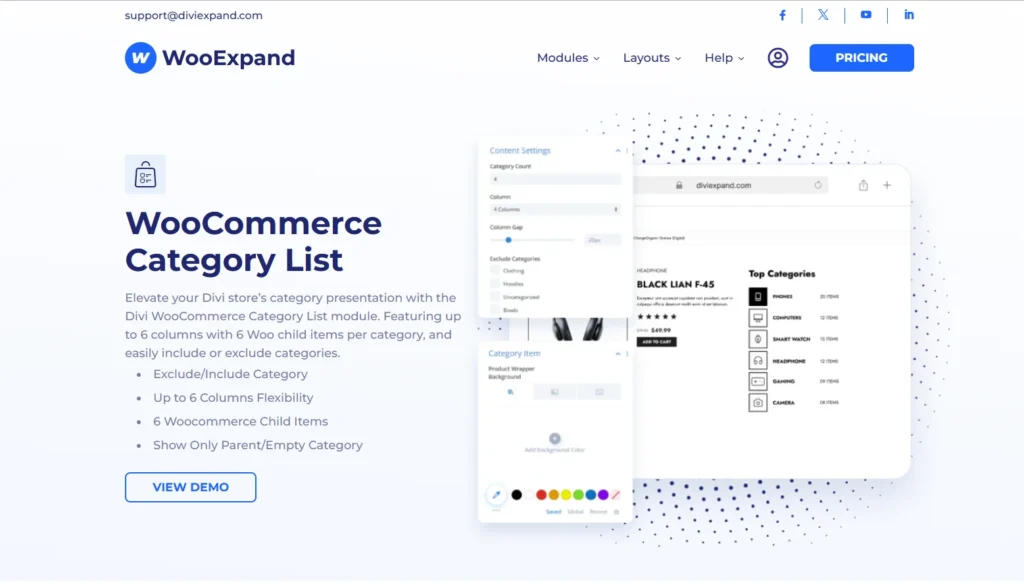
The good news is WooExpand fills this gap perfectly.With the WooExpand Product Category List Module, you can visually create and customize elegant category lists directly inside the Divi Builder. Perfect for sidebars, homepages, and category-focused landing pages.
Why Use a Category List in your Divi Store?
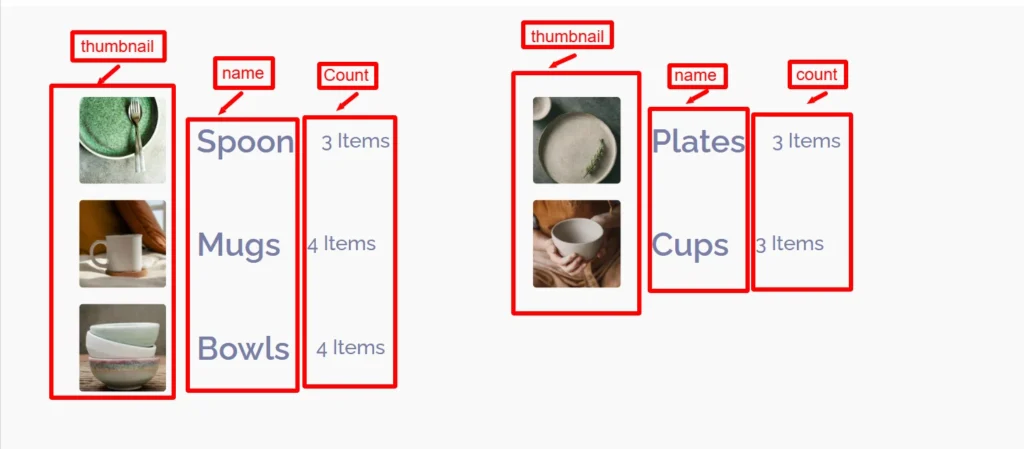
The Product Category List Module is part of WooExpand’s Divi WooCommerce toolkit. You can display category images, titles, product counts, and even custom hover effects — all styled directly in the Divi Visual Builder.
Key Features
- Fully responsive list layout
- Dynamic category data (image, title, product count)
- Divi Visual Builder integration
- Custom hover, overlay, and border controls
- Works seamlessly with other WooExpand modules
How to Use a Category List in Divi
Step 1 – Install & Activate WooExpand
- Get WooExpand from the pricing page
- Simply upload the plugin in your WordPress dashboard and activate it.
- Enter your Licence Key & enable modules.
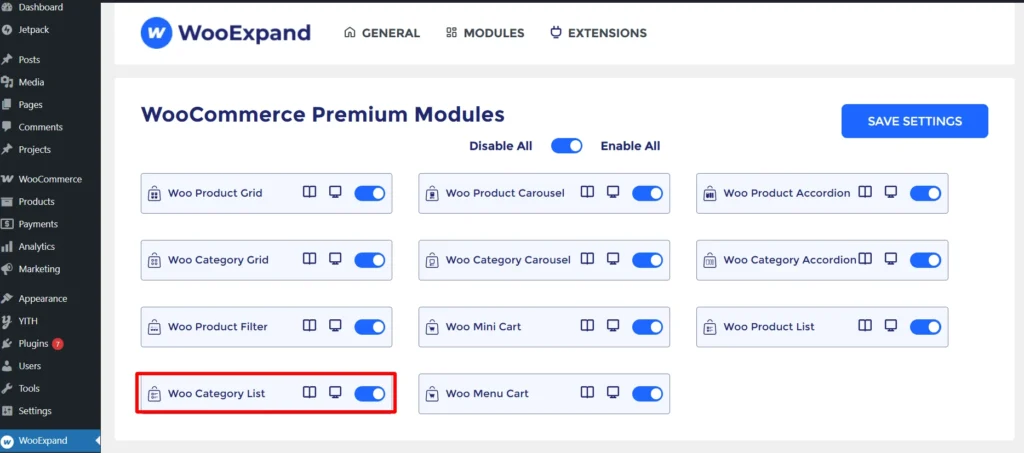
Step 2 – Activate the Category List Module
- Go to the dashboard of your WordPress
- Check if the Category List Module is enabled or not from the WooExpand settings.
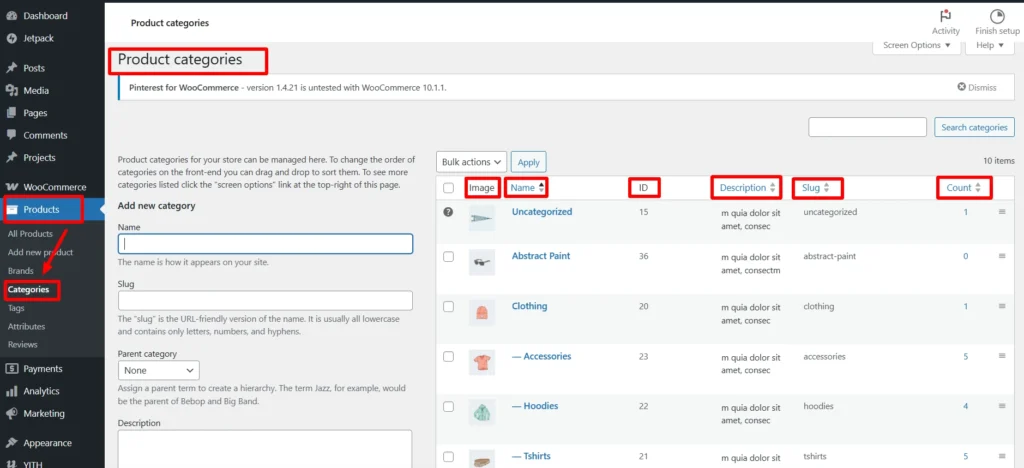
To ensure proper display of your product categories:
- Add an image, name, description, and slug from your WordPress Dashboard under Products > Categories.
- Since the module works dynamically, this information must be provided directly from your WordPress dashboard, otherwise categories won’t display correctly.
Step 3: Open the Divi Builder
- Create or edit a page
- Add a WooExpand Category List Module

Step 4: Configure Your List
Select Product Source: WooExpand has a total of 6 child elements for the Category list module. You can select any of your preference elements from here.
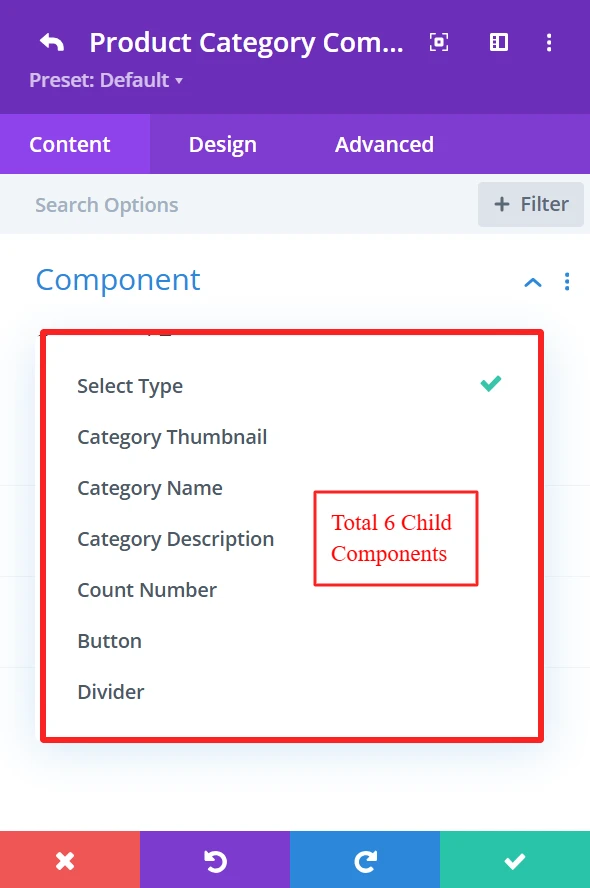
You can add child elements using the + icon. As here, these three child elements are added to create a demo design.
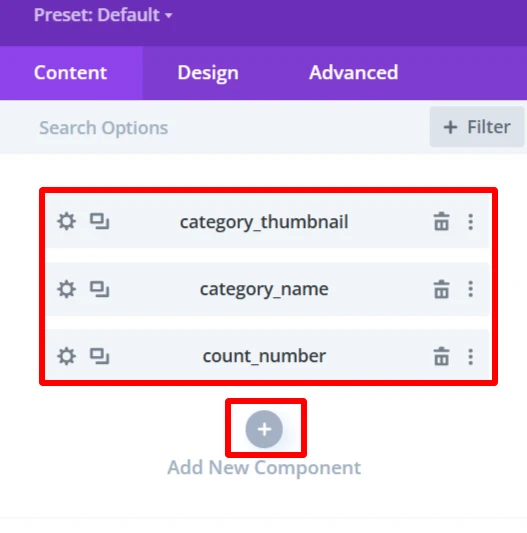
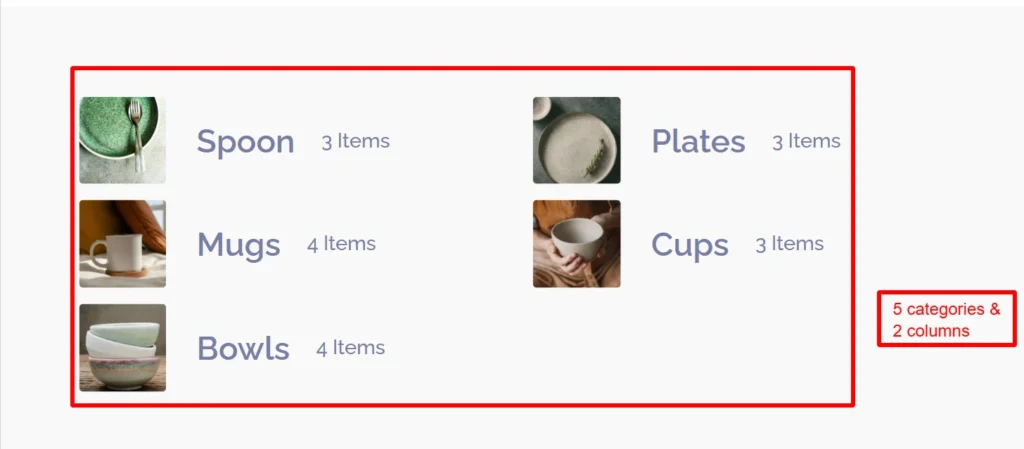
From the Content Settings, you can set the Category count, number of columns also you can exclude categories that you don’t need and many more.
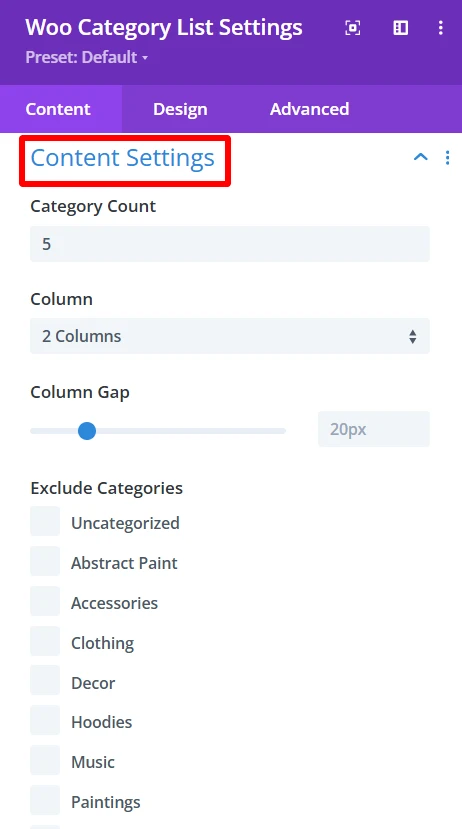

- Order By: The Order By choice is how you want the categories to be sorted in the list.. You can select name, count, or slug to sort categories.
- Order: Allows you to specify if the categories should be sorted in ascending or descending order.
- Show Only Parent Categories: This toggle is a way to display only Parent Categories and omit any subcategories.
- Show Empty Categories: This setting controls whether empty categories are shown on the list.
- Offset Number: The Offset Number option allows you to skip a defined number of categories from the beginning of the list.
Step 5: Experience Design with Divi-Controls
Easily change spacing, typography, colors, etc, from the design panel.
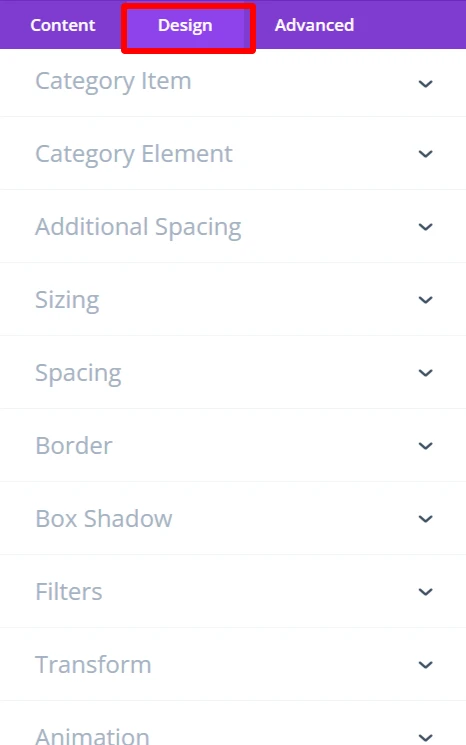
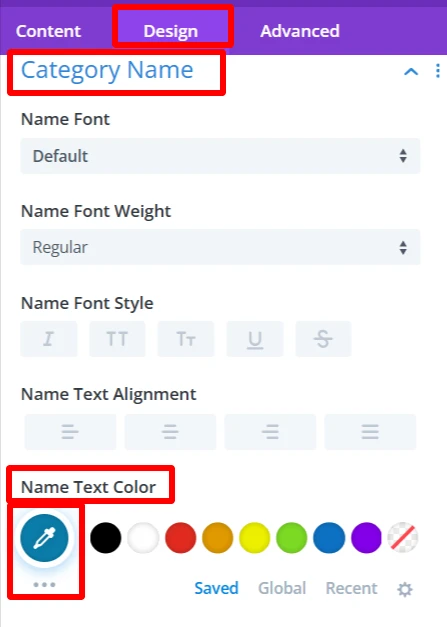
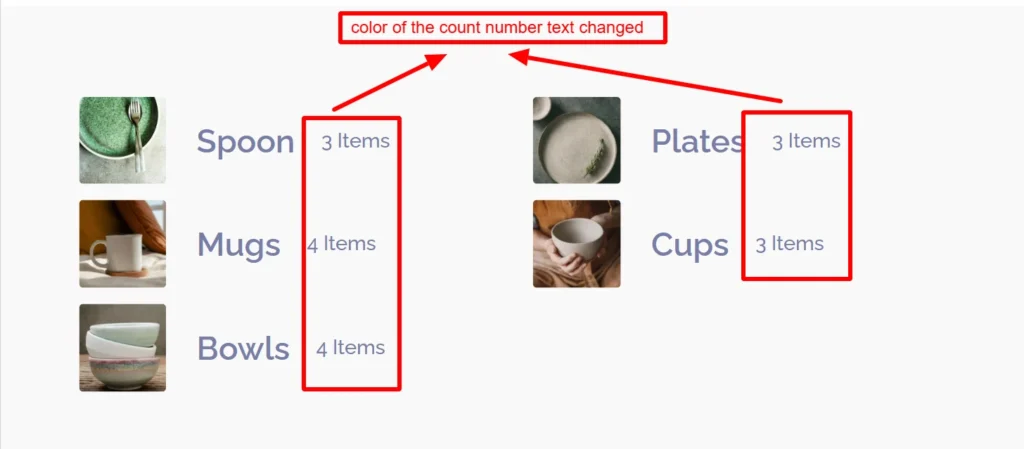
As you can see, the color of the text of category name child component was changed using the design tab of this component.
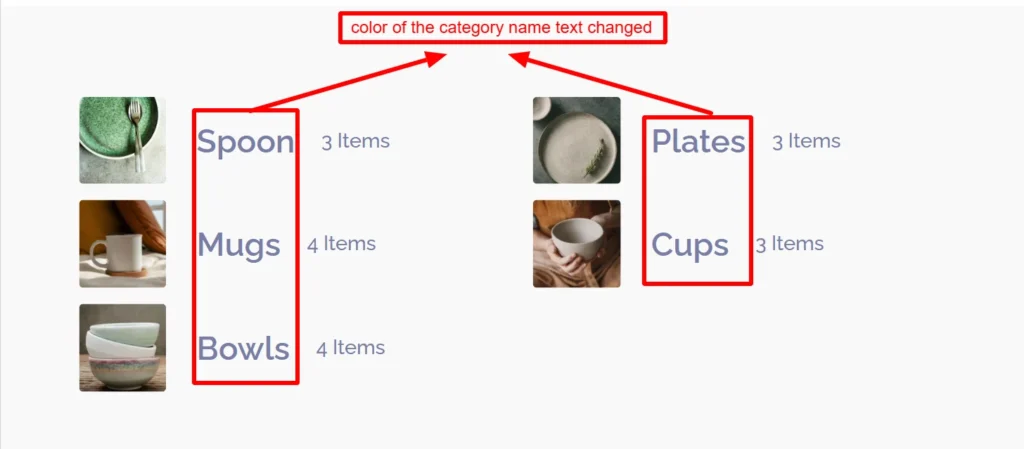
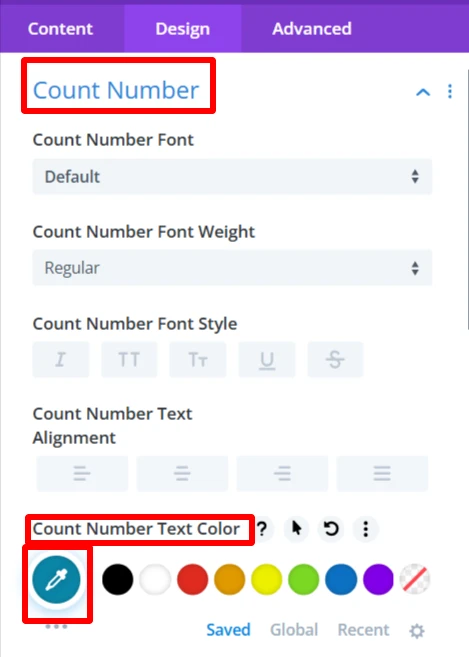
Also, the color of the text of the count number child component was changed using the design tab of this component.
For more information about these features, you can visit WooExpand’s documentation about Category List.
Step 6: Preview and Publish
- Preview the category list desktop View and mobile View
- When you are satisfied with the design, publish your page and go live
Demo & Styling Inspiration
Do you want to see what it looks like before you try?
👉 View the Live Demo Here — Discover category list module
Conclusion
In 2025, if you are creating a Divi + WooCommerce site and you want tools that support selling, without slowing things down. WooExpand Category List Module will empower you to create responsive, gorgeous product categories without any code.
- See Live Demo
- Get WooExpand Now — Lifetime License Available!


0 Comments